Step by Step Software Working Guide
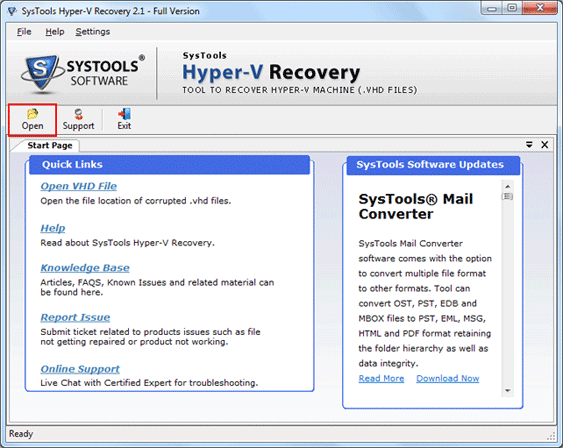
Step 1
Download the software and Run the .exe file on host machine. Home window will appear just click on Open button from menu bar.
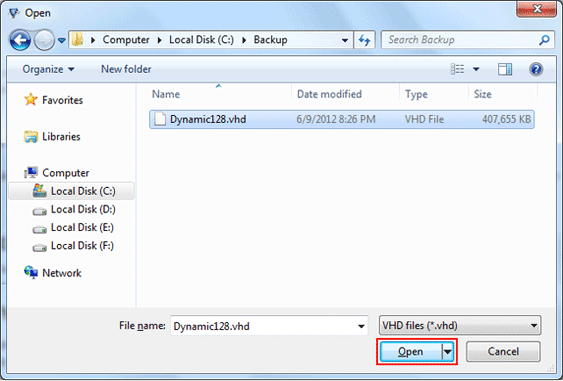
Step 2
Select the .vhd file and click on the OK.
Step 3
Optional Step: - If master boot record corrupted then click on the Setting and then hit on the Row Scan option.
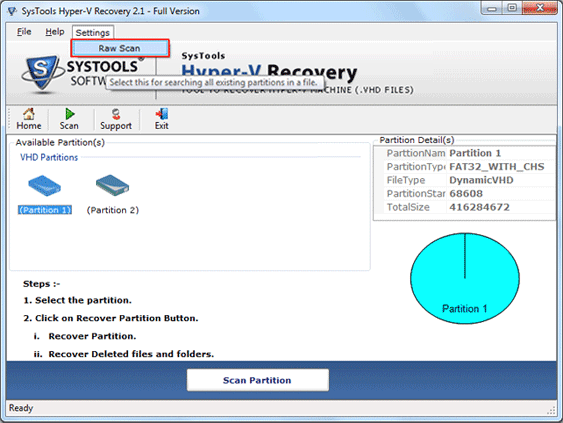
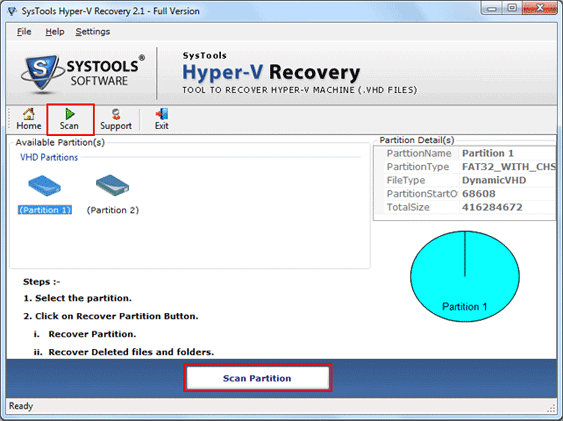
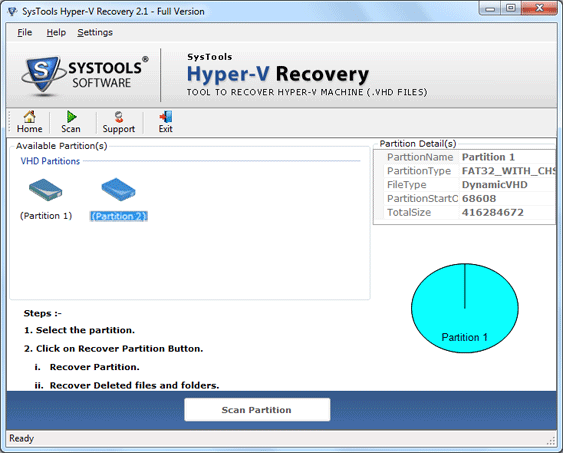
Step 4
Now select the damaged partition and click on the Scan Partition button as highlighted.
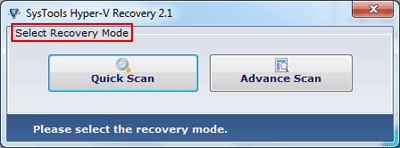
Step 5
Choose Quick Scan or Advance Scan mode according to level of damage.
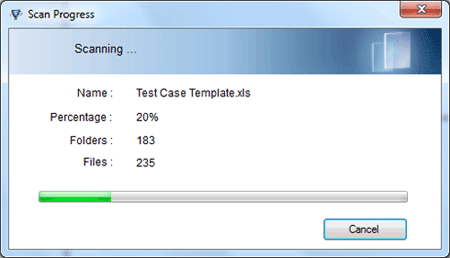
Step 6
Now a dialogue box will appear with Scanning Process details.
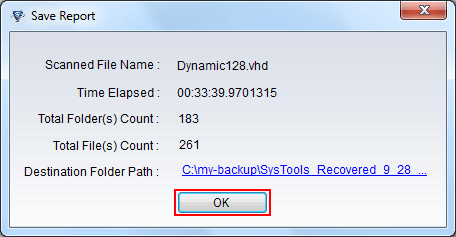
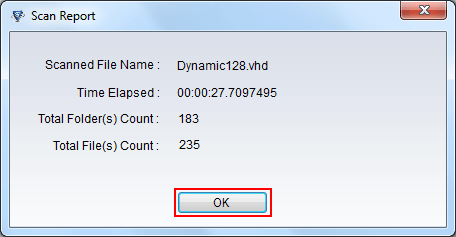
Step 7
Once the scanning process completed, a pop up windows will be opened with complete scan detail. Click on the Ok button.
Step 8
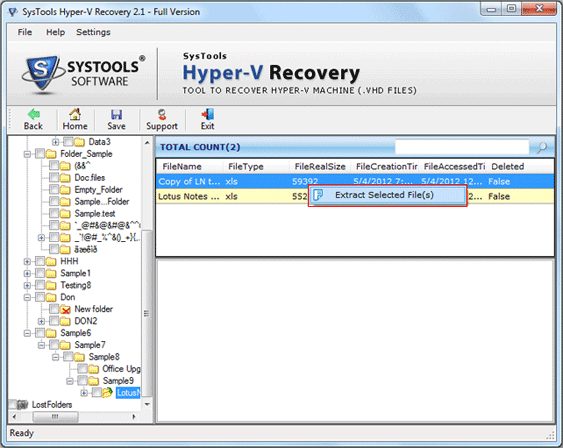
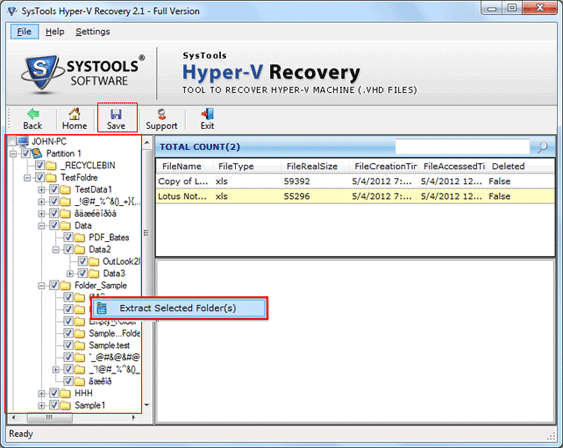
Here you can find the required file by expanding folder tree from the left pane of the software. You can also find the specific file by providing attribute of file, like name, size, creation date etc.
Note: - It will mark read cross on all permanent deleted recovered files or folder as shown below.

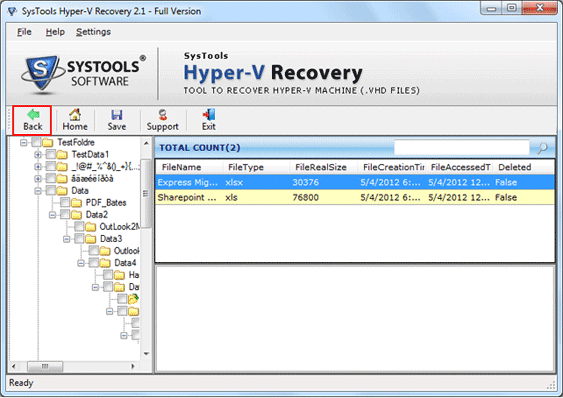
Step 9
If you wan to rescan the partition or want to scan another partition just click on Back button. No need to perform complete process again.
Step 10
Now select the second or the same partition as your requirement and perform the scanning process as discussed above.
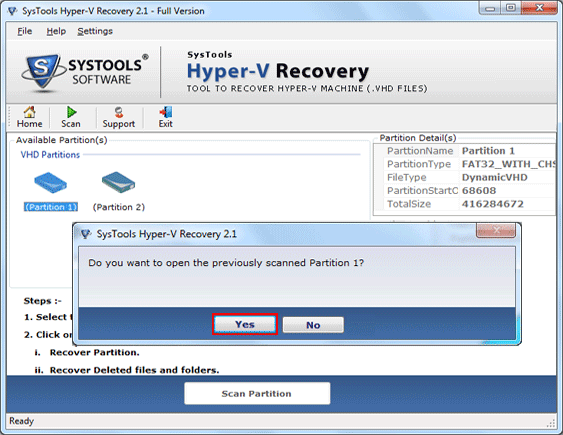
Step 11
If you choose the same partition then software will ask you to open previous scanned file or want to rescan the selected partition. Simply click on the Yes Button.
Step 12
You can extract single file just Right Click on the file from the right pane of software window.
Step 13
You can also extract complete folder, just click on the Save or select desired folder from folder tree.
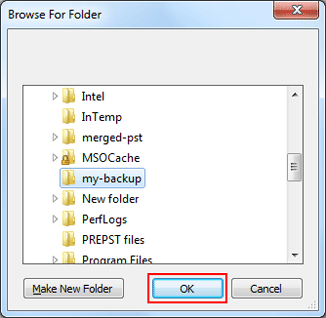
Step 14
Provide path to save the recovered file or folder. You can also create new folder by clicking on the Make New Folder button.
Step 15
Now a dialogue box will appear with all extracting details.

Step 16
Once the extracting process completed, click on the OK button to complete the process.